Good website writing is the key to make a website or blog successful. It is also the most required term for capturing readers’ interests in this exploding digital universe.
Considering the readers in mind, a good writer will try every possible aspect that makes the content effective and influencing.
Let’s consider, you have multiple authors on your website, and each one works best. In certain situations, it may get challenging to reward the well-performing author.
So, to highlight editorial success, author tracking becomes essential. Doing this also establishes the means of creating enthusiasm within an organization towards content writing.
Another reason for tracking the author is to check if the author you are paying worthwhile.
If you’re outsourcing work to several authors, it is always recommended to have metrics on their work performance as well as the quality of their work.
Other reasons to enable author tracking:
- Sort page views for articles by the author.
- See which author’s posts keep visitors on your site by analyzing the bounce rate.
- Get instant WordPress author stats for optimization.
Ready to find out your blog author stats?
In this guide, I will show you how to enable author tracking in WordPress with Google Analytics.
Install MonsterInsights
The first and foremost thing you have to do is install MonsterInsights. It makes tracking your site with Google Analytics more accessible, and you can read all reports right into your WordPress dashboard.
To enable author tracking, you have to configure custom dimensions both in your WordPress site and in your Google Analytics account.
MonsterInsights plugin offers the easiest way to add the Author as the custom dimension.
To add custom dimension,
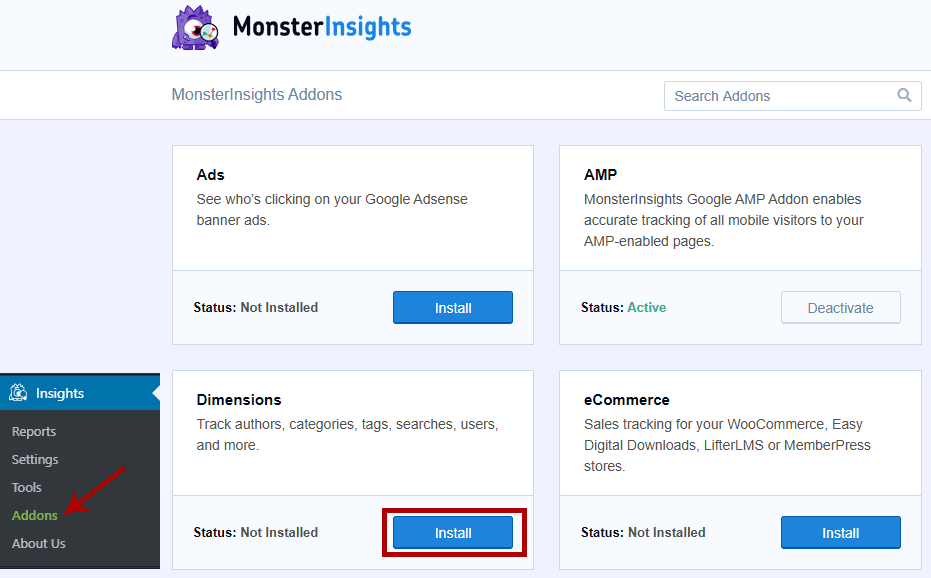
Activate the MonsterInsights Pro plugin. After activation, go to Insights >> Addons to install and activate the Dimensions addon.
Now, connect Google Analytics with WordPress.
After this, go to MonsterInsights >> settings >> Conversions >> Custom Dimensions.
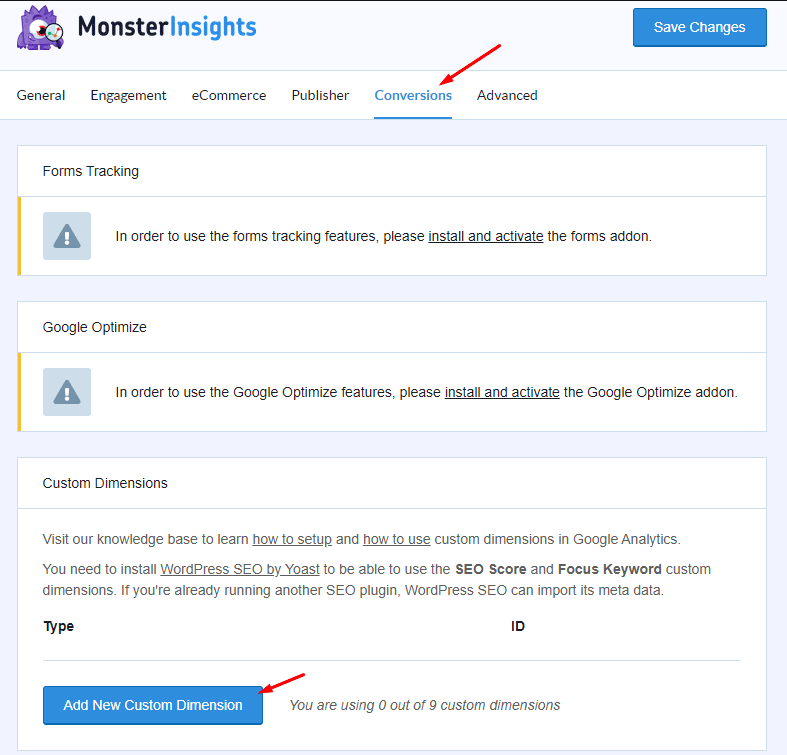

Hit Add New Custom Dimension button and add Author by selecting it from the drop-down menu and select its ID.
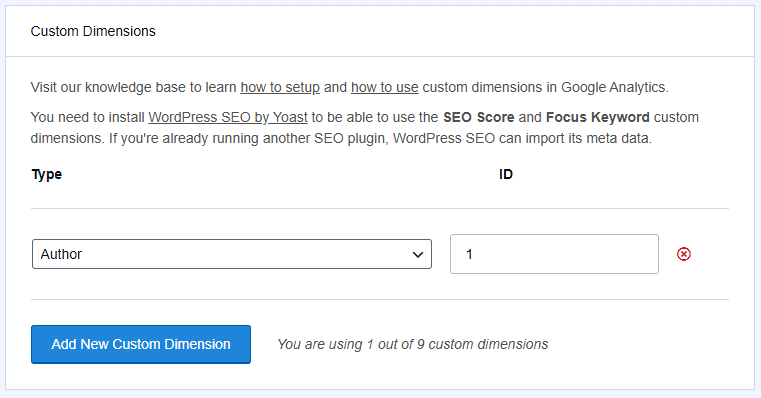

Click Save Changes.
Now, login into your Google Analytics account.
Open your property (site or blog) in which you wish to add custom dimensions for author tracking.
Now, visit Admin tab >> Click Custom Definitions >> Custom dimensions.
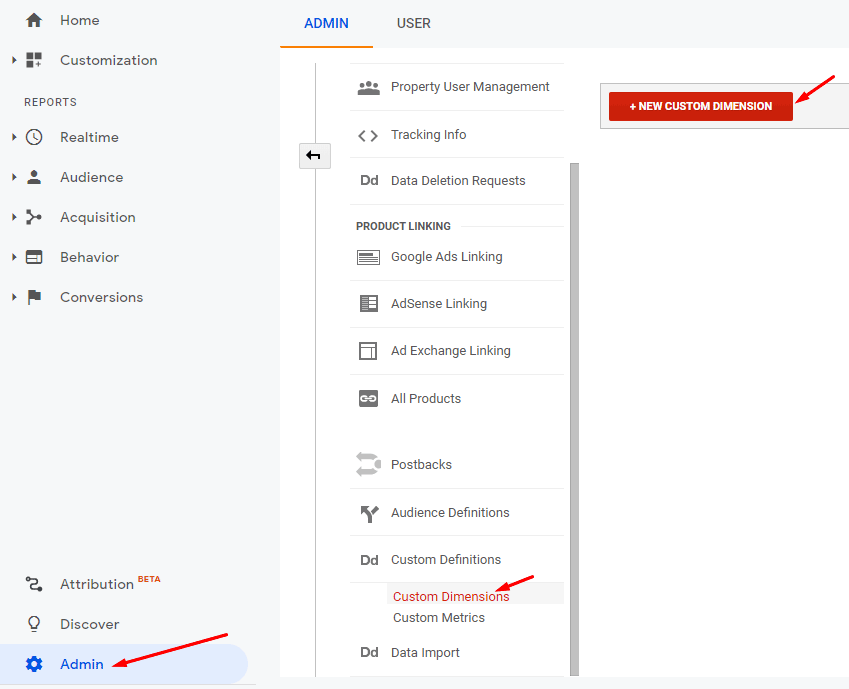

A form will appear, where you need to type Author in the Name field and set the scope as HIT.
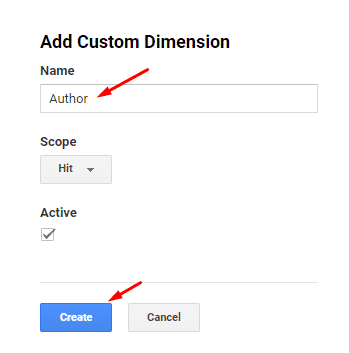

Click Create. Do not mess up with other settings.
Later on, Match the index number of Google Analytics with Custom Dimension ID that’s available in your WordPress MonsterInsights settings. The index number is available under the Index column in Google Analytics. Simply note this index number.
- Head back to your WordPress Dashboard.
- Go to Insights >> Settings >> Conversions >> Custom Dimensions.


Here, check if the Custom Dimension ID matches the index number in Google Analytics.
Adding a custom report in your Google Analytics account
In Google Analytics, go to Customization >> Custom Reports >> New Custom Reports. A form will generate, where you need to define the metric groups.
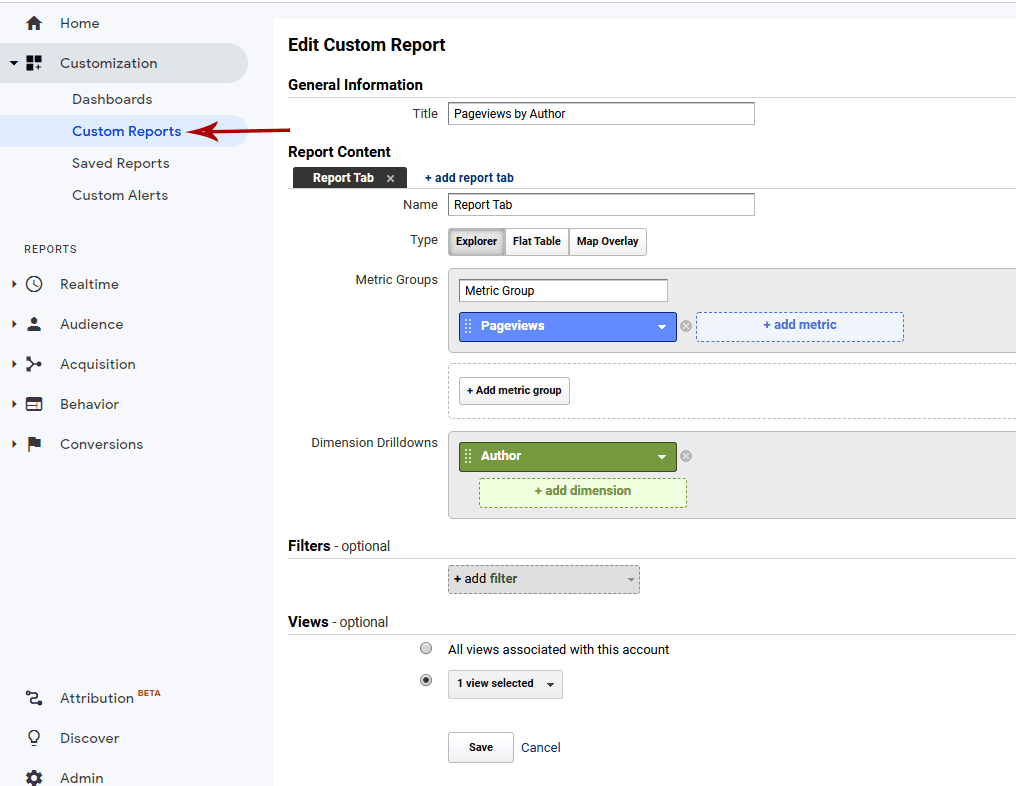

Add Author in the Dimension Drilldowns and click on the Save button.
Now, you can see the traffic report for your Author dimension.
To see the report on Author Dimension:
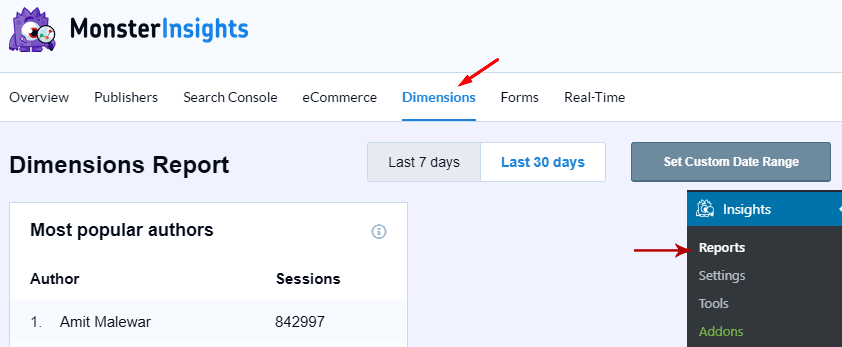
- You can view Author tracking into your WordPress Dashboard.
- To see the report, go to Insights >> Dimensions.

Making an ideal user experience for your site’s users isn’t a precise science, however, focusing on specific performance metrics can give you proper direction.
I hope this guide helped you in setting up author tracking in WordPress with Google Analytics. Let me know your views in the comment section below.
[ad_2]